If you already write pipelines in a .gitlab-ci.yml file, getting one running on your own server shouldn't take an afternoon. Here's how to go from nothing to a working pipeline on Gisia.
Why Self-Host?
Hosted CI/CD is convenient until you hit minute limits, pay per build, or just want your pipelines on hardware you control. Self-hosting fixes all three, and Gisia keeps the same .gitlab-ci.yml format in a much smaller footprint than a full platform.
What Runs a Pipeline
The Git platform doesn't run your jobs — it schedules them and hands them to a runner, a small agent that executes the job and reports back. So you always need at least one runner. Gisia uses this same model: register a runner, it polls for jobs, and runs whatever your .gitlab-ci.yml defines.
Quick Setup
Assuming Gisia is already running — see the small VPS walkthrough to boot it — the whole path to a live pipeline is two steps:
- Register a runner — generate a registration token at the project or group level and start the runner agent with it.
- Add a
.gitlab-ci.ymlto your repo and push — the pipeline triggers automatically.
No wizard, no separate CI service to wire up.
The Anatomy of a .gitlab-ci.yml File
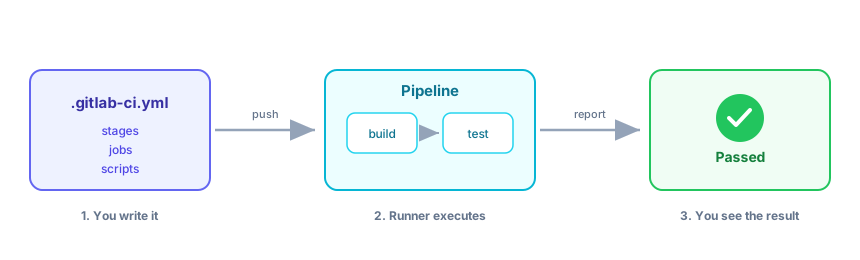
A .gitlab-ci.yml file describes a pipeline, built from just three pieces:
- Stages — the ordered phases the pipeline runs through, declared once with the
stageskeyword (e.g.buildthentest). Stages run one after another. - Jobs — the units of work, written as top-level keys you name (like
build-job). Each job belongs to a stage, and jobs in the same stage run in parallel. - Scripts — inside each job, the
scriptkeyword lists the shell commands the runner executes.
So the shape is always the same: a pipeline is a set of stages, each stage holds one or more jobs, and each job runs a script. Everything else — caching, artifacts, rules — is an extra you layer on.
Your First Pipeline
A minimal .gitlab-ci.yml — paste it into your repo, push, and watch it run:
stages:
  - build
  - test

build-job:
  stage: build
  script:
    - echo "Building the project..."

test-job:
  stage: test
  script:
    - echo "Running tests..."
Two stages, two jobs. Push it, and Gisia hands the jobs to your runner in order and shows you the logs. Swap the echo lines for your real commands and you've got working CI.
Which .gitlab-ci.yml Keywords Are Supported
Once your first pipeline runs, you'll reach for more keywords. Here's the honest breakdown.
Note: This reflects Gisia v1.4.0. Coverage expands each release, so check the docs for the latest.
Fully supported — the keywords most pipelines are built from:
stages, stage, script, before_script, after_script, variables, default, rules, tags, artifacts, cache, dependencies, extends, inherit, parallel, retry, timeout, allow_failure, interruptible, hooks, inputs, workflow.
Partially supported — usable, with some options not yet implemented:
image, services, include, needs, trigger, spec, when.
Not yet supported — worth knowing before you migrate:
environment, release, pages, secrets, coverage, resource_group, id_tokens, dast_configuration, and a few other enterprise-oriented keywords.
For a full reference, Gisia ships its own CI YAML reference docs. The takeaway: everyday build-and-test pipelines run as-is; the gaps are mostly advanced or enterprise features.
Wrapping Up
Self-hosted CI/CD doesn't have to be a weekend project. With Gisia you register a runner, drop in a .gitlab-ci.yml, and push — the same YAML you already know, on a lightweight server you fully own.